Overview
Welcome to the Getnet Regional API, or Single Entry Point (SEP). This is our core REST API for direct payment integration, giving you complete control over your payment flows and user experience.
What it is
The Regional API enables merchants to access Getnet’s services across multiple Latin American countries through a single integration. With it, you connect once and can operate seamlessly in all supported markets.
Designed for PCI-compliant businesses, this API is ideal for companies looking to build a fully customized, omnichannel payment solution. By integrating with the Regional API, you gain access to the Getnet ecosystem, which supports a wide range of payment methods and transactions across several countries.
The Regional API provides several features, including:
- Different payments methods
- Tokenization
- Subscriptions
- Refunds
- Webhook notifications
- 3D Secure
Benefits
- Operate in multiple countries while supporting their local payment methods and adapting to local regulations.
- A strategic solution to operate across various Latin American countries, simplifying integration and centralizing multiple payment services.
- A single API that covers payment platform + gateway + value-added services, such as the anti-fraud system.
- Integration support, available technical documentation, and a specialized team for adopting SEP.
Getnet Regional API
The Regional API or Single Entry Point (SEP) is a unified solution that consolidates multiple local payment systems into a single integration. The API addresses the specific needs of diverse markets by supporting local and global payment methods. You adapt to regional requirements quickly without managing multiple fragmented integrations.
This API is designed for businesses that are PCI compliant and want to build a fully customized, omnichannel payment solution. By integrating with the Regional API, you can connect to the Getnet ecosystem, which supports transactions across multiple countries and payment methods.
The diagram below illustrates the Single Entry Point architecture, showing how the Getnet Digital Platform connects Core Solutions (Direct API, Checkout, and Payment Links) to various Alternative Payment Methods (APMs) and Core Acquiring services across different countries. It provides a visual overview of service availability and regional coverage.
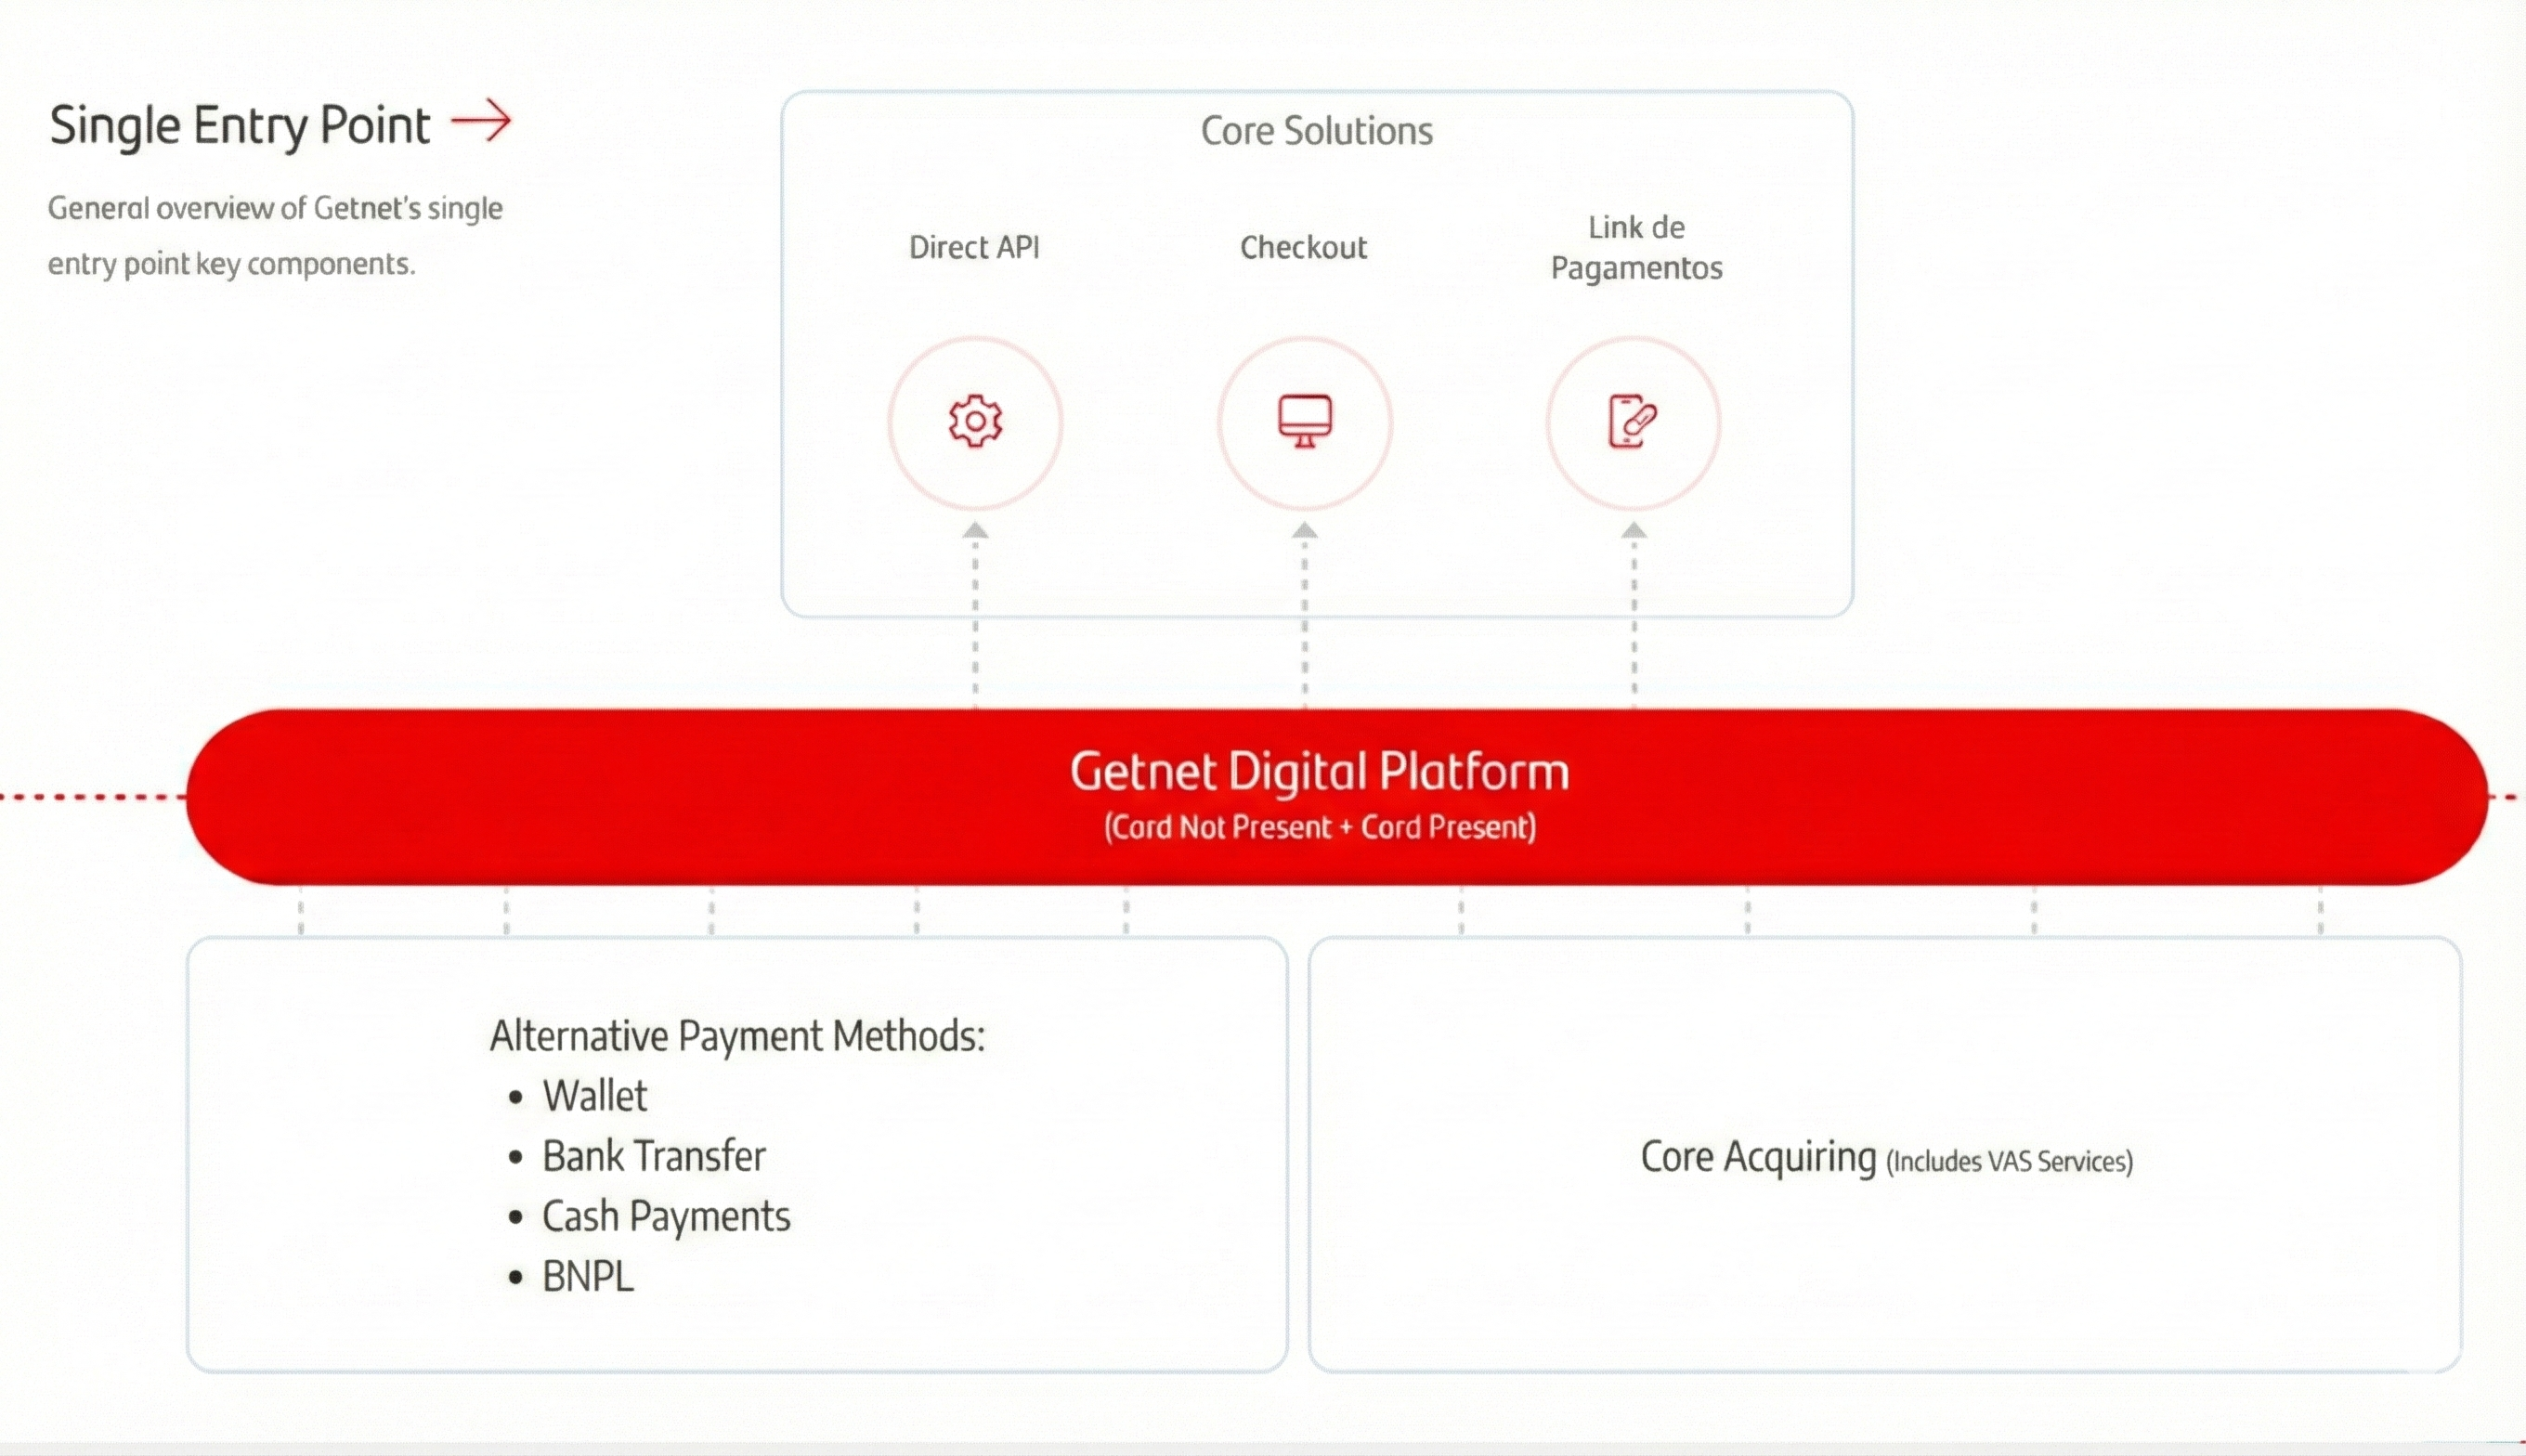
Single Entry Point: One Integration, Multiple Markets
Through the Single Entry Point, merchants can process payments across multiple countries and scenarios using a single integration. The Getnet Digital Platform acts as a unified gateway that connects your application to:
- Core Solutions: Direct API (Regional API), Checkout, and Payment Links
- Alternative Payment Methods (APMs): Local payment methods like PIX (Brazil), Bizum (Spain), OXXO (Mexico), and many others
- Core Acquiring Services: Card processing and Value Added Services (VAS) across all supported markets
- Argentina | Brazil | Chile | Mexico | Spain | Uruguay | Spain
This unified approach eliminates the need for multiple integrations, allowing you to expand into new markets quickly while maintaining a consistent payment experience across all regions.
Available Services
The Regional API provides a comprehensive set of payment services and features:
Card Payments
Process credit and debit card transactions with full control over the payment flow:
- Single-Step Payments - Authorize and capture payments in a single API call, ideal for immediate fulfillment scenarios
- Pre-authorized Payments - Two-step flow that reserves funds first, then captures when ready to fulfill the order
- 3DS Payments - Add an extra layer of security with 3D Secure authentication to comply with Strong Customer Authentication (SCA) requirements
The Regional API also supports recurring payments and one-click payments for enhanced customer experience.
Alternative Payment Methods (APMs)
Support local payment methods popular in specific regions. See the Supported Payment Methods page for a complete list of available APMs, including digital walllets, bank transfer, and other regional payment solutions.
Next Steps
Ready to start integrating? Follow these steps:
- Quickstart - Create your first payment transaction in minutes.
- Authentication - Learn how to authenticate with the API and manage access tokens.
For detailed implementation guides, explore the Payment Guides section.